Developers » AS2 tagging » Android » Getting started » Integration of the library
Integration of the library
Foreword
Before starting, you must first download our SDK via the Tag Composer application by logging in to your AT Internet account.
The latest version of our SDK requires Android 2.3 minimum.
Archive contents
Once set up and downloaded, decompress the archive contents onto your computer.

Integration in Android Studio
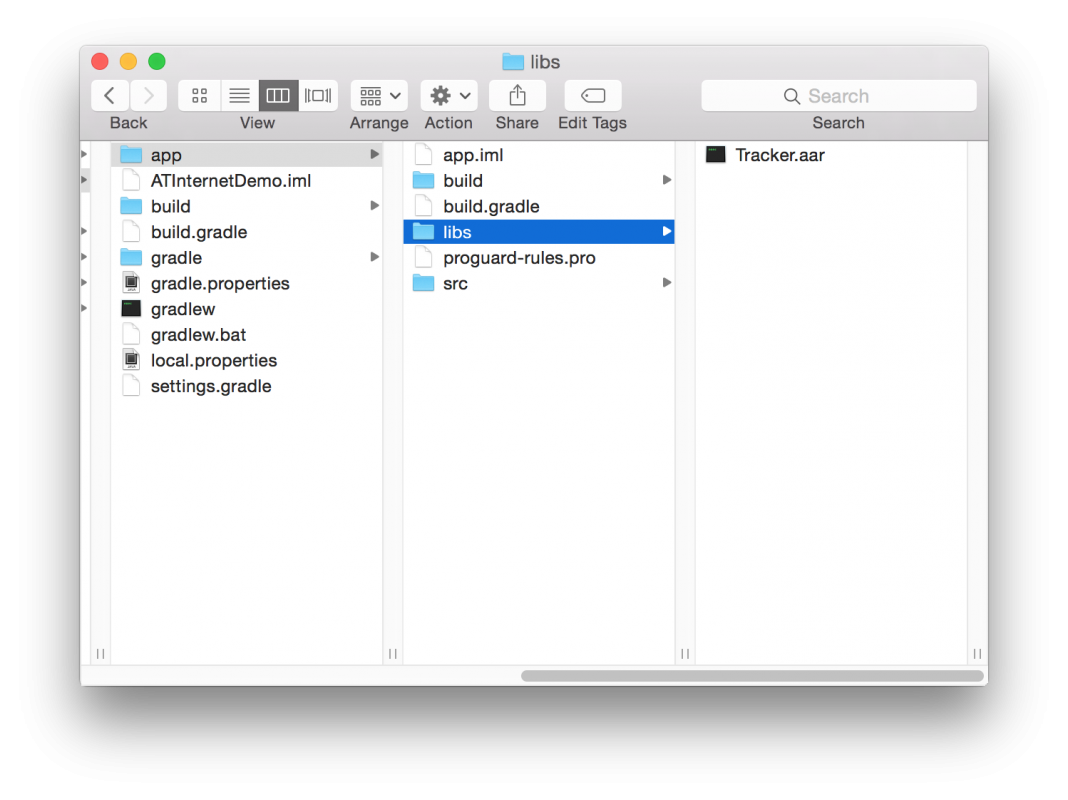
To integrate the library into your project, copy the library and paste it into “MyProject/app/libs” folder (if the folder doesn’t exist, create it, Android Studio recognise it when the project will be built):
Then, in Android Studio, click on Sync Project with Gradle Files:

If you have selected JAR, the library is ready for use.
If you have selected AAR :
To follow integration notice, it’s recommended to put the project in “Project” view (dropdown list at the top left), Android Studio is in “Android” view by default when the project is created.
Elapse the project, and the “app” module and select build.gradle file

Build.gradle file :
android {
    compileSdkVersion 22
    buildToolsVersion "21.1.2"

    defaultConfig {
        applicationId "com.atinternet.atinternetdemo"
        minSdkVersion 10
        targetSdkVersion 22
        versionCode 1
        versionName "1.0"
    }
    buildTypes {
        release {
            minifyEnabled false
            proguardFiles getDefaultProguardFile('proguard-android.txt'), 'proguard-rules.pro'
        }
    }
}

// If this block doesn't exists, add it
repositories{
    maven {
        url "https://dl.bintray.com/atinternet/maven/"
    }
    flatDir {
        dirs 'libs'
    }
}

dependencies {
    compile fileTree(dir: 'libs', include: ['*.jar'])
    compile 'com.android.support:appcompat-v7:22.0.0'
    // Add this line
    compile(name: 'Tracker', ext: 'aar')
}
Finally, click once more on Sync Project with Gradle Files (see figure 2).
Using MavenCentral dependency
It is also possible to integrate AT Internet’s Android SDK by adding the dependency to your project.
To do this, scroll through your project, select the build.gradle file, and make sure that mavenCentral() is present in the two repositories blocks. If this is not the case, please add it.
Once the file is open, you must simply add the following snippet into the dependencies block:
Once the file is open, you must simply add the following snippet into the dependencies block:
compile 'com.atinternet:Tracker:2.x.x'
build.gradle file:
apply plugin: 'com.android.application'

android {
    compileSdkVersion 23
    buildToolsVersion "23.0.2"

    defaultConfig {
        applicationId "com.atinternet.atinternetdemo"
        minSdkVersion 10
        targetSdkVersion 23
        versionCode 1
        versionName "1.0"
    }
    buildTypes {
        release {
            minifyEnabled false
            proguardFiles getDefaultProguardFile('proguard-android.txt'), 'proguard-rules.pro'
        }
    }
}

repositories {
    flatDir {
        dirs 'libs'
    }
}

dependencies {
    compile fileTree(dir: 'libs', include: ['*.jar'])
    compile 'com.android.support:appcompat-v7:23.1.1'
    compile 'com.atinternet:Tracker:2.x.x' // >= 2.14.0
}
Please note, it is highly important to overwrite this configuration with your application’s information (please refer to documentation on overwriting configurations).
The library is now ready for use.
Last update: 17/02/2021